It’s time for another friendly public service announcement from your friends over at AvalonKing. Today’s topic circles around why ceramic coatings should NOT be considered as forms of indestructible automotive armor, and why you, the vehicle owner, need to either protect or replace that crystal-clear shell.
Does having the strongest, scratch-resistant ceramic coating on the market at your disposal mean buying a 9H hardness rated product? Without question. Will this crystallized coating eventually begin to wear thin and require replacement, or occasional upkeep? You bet your ass it will.
At this point in automotive history, there is no “set it and forget it” ceramic coating solution, even when using a high-end ceramic pro product. Sure, there are coatings out there that are marketed as “long lasting,” with Armor Shield IX leading the pack with a 2-year protection guarantee. But even then, the world’s highest rated ceramic coating can falter when atop all that paint sealant and clear coat.
Let’s double-back for a moment, and revisit the basics for a moment, as that will allow us to delve a bit deeper into the “protect or replace” portion of the ceramic coating revolution. So while there may not be a permanent surface protectant solution on the market, a bit of upkeep can do wonders for squeezing every last kilometer out of a ceramic paint coating.
”There is nothing permanent in the world except change.”
–HERACLITUS
Signs That an Old CeramicCoating is About to Shit the Bed

So you’ve given up on using carnauba wax, and have been rocking a ceramic coating for the better part of a year. But in recent weeks you’ve become concerned that it might be time for a little upkeep, outside of the recommended bi-weekly car wash routine. So what are the warning signs that your ceramic coating may need some additional protection, or even a complete removal and replacement?
Well for starters, it’s worth recalling that the average lifespan of a 9H-rated ceramic coating like Armor Shield IX typically lasts anywhere from 2 to 5 years before requiring removal and reinstallation. While a full 5 year lifespan is occasionally observed in professional coating products, these timeframes are typically observed when the vehicle in question is garage kept, routinely cleaned, and rarely driven. In contrast, daily beaters and weekend warriors tend to see an average Armor Shield IX lifespan of 2-3 years, especially when a thorough cleaning is implemented every other week.
Accurately projecting the longevity of a ceramic coating can be tricky as hell too. When applied to the exterior of an automobile, one must factor in how often the vehicle is driven, how/where it is stored, the elements encountered whilst driving, and how diligent the owner is about cleaning their machine. A convertible that only gets taken out on warm, sunny afternoons, and is then meticulously detailed upon its return, will not need nearly as much attention as say, a 4×4 that gets daily-driven, and then thrashed in the mud every weekend.
In contrast, the warning signs that a ceramic coating is beginning to weaken are almost always the same, regardless of vehicle, environment, or maintenance upkeep. The first thing you will likely notice is a loss of shine, as what was once a glassy surface, has become a hazy host for road debris and bug guts. You may also notice an overall loss of hydrophobic response, where water does not bead-up and roll away like it once did. In exceedingly rare cases, the visible peeling of the ceramic coating itself can be witnessed, which is typically a red flag that the surface area has been damaged in some way.
So is there something that can be done to prolong the life of a ceramic coating, or help keep it functioning properly over the course of its lifespan? In short, yes. But it’s going to take some diligence on your end, and will most certainly require some additional cleaning and topical chemicals.
Generally speaking, ceramic coatings are engineered to repel, not absorb. So when extending the lifespan of a ceramic coat, opting for the right “topper/booster” can be crucial. These ceramic coating toppers are quite numerous, many of which can be safely purchased from the comfort of your couch. Unfortunately, many of these products are little more than “snake oil” in a fancy bottle, complete with a shit-ton of marketing jargon slapped atop an eye-catching label. However, that’s not to say that all of the boosters out there are total bullshit. You just need to be cautious about what you purchase, and always do some research beforehand.
The trick to finding a solid ceramic coating booster/topper, is to look for offerings that infuse high levels of siO2 into each bottle. For instance, Mothers CMX Ceramic Coating Spray is a tested and proven product that packs both SiO2 (silicon dioxide) and TiO2 (titanium dioxide) into each bottle. Reviews of this stuff prove that the hype is real too, backing the brand’s boast that each CMX spray “…provides ultra long-term protection from the elements and relentless water beading, without sacrificing true optical clarity, extreme depth and that signature ceramic glass-like liquidy-gloss appearance.”
Now as for the detailing side of the equation, a certified, “ceramic friendly” shampoo or a reputable quick-spray product for removing car contaminants are the way to go. Just always remain cautious and do your research. The wrong chemical solution on a ceramic coated surface can wreak havoc on its ability to repel moisture and protect surfaces from foreign contaminants.
Quick Tip: After slathering a vehicle with a fresh ceramic car coating, we suggest waiting a full year before applying a ceramic-infused topper. Any sooner would be a waste of finances and resources, and any later would increase the risk of prematurely compromising the coating’s longevity.
When to Remove and Replace a Ceramic Coating

So a few years have passed, and it’s starting to look like toppers and boosters aren’t doing diddly-squat for your car’s ceramic coating. The only option left is a challenging, and potentially time consuming endeavor: Remove that old ceramic coating, and paintless dent repair with a fresh layer of nanotechnology.
Let’s not forget that the primary reason why we coat automobiles (and damn near everything else for that matter), is for protective purposes. So while it may not be a fun undertaking, witnessing a 9H hardness rated level of protection fail firsthand is far more disheartening. All of those years of protection would be for naught, leaving you with little more than a damaged piece of property, and a nagging sense of regret for what had just occurred.
Here at AvalonKing, we back our claim that Armor Shield IX will offer 2 to 5 years of protection, which is precisely why we guarantee the first two years of coverage. Now, while many customers and pro installers alike have reported Armor Shield IX having an average 3 year lifespan, these numbers tend to only be achievable when proper installation and aftercare are implemented.
In order to ensure that our customers don’t experience any gaps in protection, we strongly urge that installers err on the side of caution, and remove and recoat right around the 2 year mark. Sure, if you routinely clean your vehicle with ceramic coating approved products, only drive occasionally, and park in a temperature controlled garage made of adamantium, you have every right to feel confident that you are in that coveted 3 to 5 year longevity bracket. Just note that this paint protection gamble falls squarely on your shoulders, so don’t come crying to us if there’s a failure 4.5 years following installation and you’ve been too lazy to replace it.
Quick Nerd Note: A good general rule of wrench is to always remove and replace a ceramic coating prior to observing a failure. Armor Shield IX carries a 2 year warranty when properly installed, so sticking with a routine removal and replacement policy every other year will help keep both your vehicle and integrity protected.
Tips for Protecting an Old CeramicCoating
DON’T BUY CERAMIC COATINGS BEFORE WATCHING THIS !!
If a 2 year removal and replacement routine is not in the cards, your next best bet is protecting and maintaining a ceramic coating. Like human skin, ceramic coatings require regular upkeep, and do not do a very good job of covering up hidden damage, especially later in life. Everything from direct sunlight and road debris, to bird droppings, acid rain, and vandalism can damage the surface of a vehicle. Therefore, keeping a ceramic coating healthy is crucial to protecting a car’s clear coat, as well as everything else underneath it.
Taking this approach requires the application of a ceramic coat “revitalizer,” which we referred to earlier in this article as a “booster” or “topper.” By applying one of these ceramic coating invigorating boosters to your freshly cleaned vehicle every 3 weeks or so, you not only add to the overall longevity of the coating itself, but bolster shine resiliency and protective capabilities.
So how much money will you save by protecting an aging layer of ceramic coating instead of replacing it? That really depends upon the ceramic coating that has been applied, and your ability to maintain that nanotechnology with a high-grade ceramic booster. Ceramic coating boosters typically cost between $10-60 USD per bottle (depending upon the product selected and size), with each bottle covering multiple coating applications.
On the flipside, a single bottle of Armor Shield IX only runs $70 a pop when not on sale. Since one unit contains enough product to coat most small to mid-sized automobiles, the argument over the cost of recoating versus retaining appears to be fairly one sided.
Your best protection though, isn’t some magical chemical solution, but the act of regularly washing your vehicle twice a month with a ceramic coating approved shampoo and the old two bucket cleaning method. It is only after this routine has been completed, that the installation of said booster can be done to promote additional peace of mind.
Speaking of car washes, you should always conduct a full scrub after your vehicle has come into contact with harsh or unknown chemicals. Those living in northern regions should also remain wary of road salt and deicers, as they too like to eat into ceramic coatings if given enough time.
Oh, and go ahead and skip all of those “hybrid ceramic coating products,” which claim they safely blend ceramic coating technology with wax and whatnot. Over the years we’ve discovered that these products not only impede the protective characteristics of the ceramic coating itself, but can lead to further maintenance issues over time.
Quick Tip: Avoid non-potable, untreated water from lakes, rivers, groundwater, natural springs, and untested ground wells or any form of reclaimed water source. Reclaimed water is commonly found in large cities, where recycled water is the only feasible option for watering the lawn, or you guessed it, washing your automobile. These water treatment plants often leave minerals and harsh chemicals suspended in the water, which have the ability to leave harsh water spots on hard surfaces.
Outside of routine cleaning, utilizing a good water source on wash day, and sticking with a ceramic booster regiment, the next best thing you can do for your ceramic coated vehicle is keeping it locked away safe somewhere. Garaging in a controlled environment increases the longevity associated with a ceramic coated vehicle’s paintwork exponentially. The only catch here is whether or not you have a garage at your disposal, because if not, building one will add a lot of zeros to that ceramic coating budget.
How to Remove Old CeramicCoating

Eventually, you ceramic coating’s semi-permanent layer of protection will begin to wear thin. This degradation brings with it concerns over things like UV rays, sun damage, and the daunting task of removing the coating itself. While there are quite a few creative approaches to stripping a ceramic coating from an automobile (we suggest avoiding the 80-grit sandpaper approach), there are a few methods that have been proven to be quite effective when conducted properly.
Chemicals
The first method involves chemically stripping the ceramic coated surface, which is both the easiest, and potentially harmful approach to cutting through the hydrophobic properties of this nanocoating. Chemicals can be dangerous to work with and finnicky, and do not always evenly penetrate the surface. However, when properly applied, alkaline-rich chemicals have the ability to chew into ceramic coatings, and force them to pull back from whatever surface they have been assigned to protect.
One of the risks you run, is that many of these chemicals can compromise a car’s clear coat and discolor plastic and rubberized trim pieces. There is also the danger of fume inhalation and chemical exposure with some of this stuff, so approach this procedure with caution, and always read the application instructions on the package before proceeding.
Quick Nerd Note: While some installers have seen Armor Shield IX last up to 5 years, very few people are willing to wait that long for any number of reasons. Don’t procrastinate. Stick with a routine ceramic coating removal and reinstallation schedule to avoid headaches down the road.
Here are a few steps we recommend you follow when utilizing a ceramic coating a chemical designed for removing ceramic coatings:
- Always check to see how harmful the chemical will be on clear coats and other surface materials. Not doing so may result in some nasty financial setbacks.
- Start by applying the chemical of your choice to a small, inconspicuous section to test the product’s effectiveness, before moving on to larger body panels.
- Remember to always wear gloves, protective eyewear, and utilize a well ventilated space. Chemical exposure and inhalation poisoning are about as much fun as watching ceramic coating dry
Clay
Applying a clay bar, or a clay mitt to a vehicle that has just been washed with a wax stripping shampoo will also get the job done in a pinch. The only catch, is that the clay bar method only seems to work well on extremely brittle, or older ceramic coatings. So if you have a coating that’s on its last gallon of gas, chances are you’ll be able to scrape it off with little more than a clean clay bar/mitt, some lubricant, and a shit-ton of elbow grease. Just don’t forget to rinse the vehicle off with clean water and hit every square centimeter with clean microfiber cloths before wiping it down with a balanced isopropyl alcohol blend.
Polishing
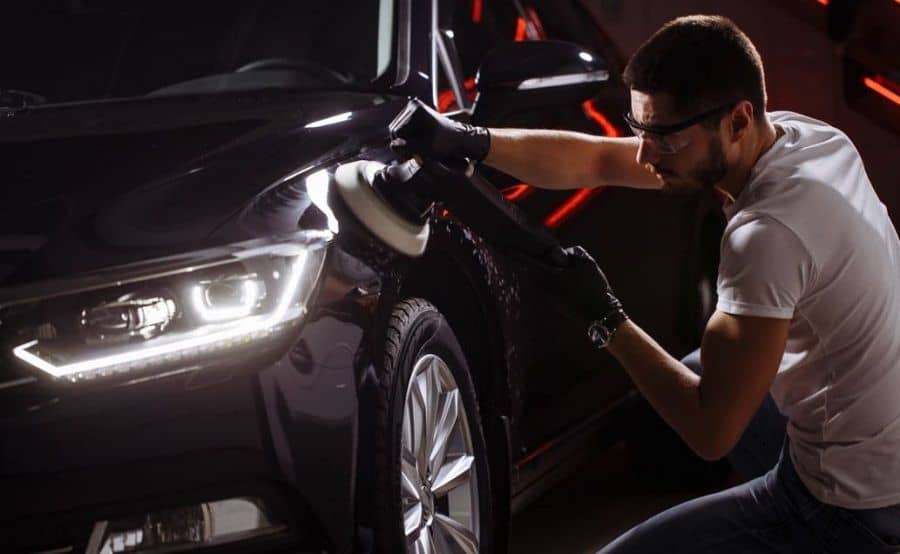
The final form of removing a nano ceramic coating product is hands-down the most intensive, and effective, method: Resurfacing via polishing. We’re not shitting you when we say that this approach is about as close to paint correction as it gets, and should not be attempted by the inexperienced. There is plenty of room for error when working with a polishing compound and an electric buffing tool, so don’t be ashamed in handing the job over to a pro if you don’t feel confident in your buffing capabilities.
As for the polishing process itself, it all starts with a thorough washing via the two bucket method, and then allowing the painted surface area to adequately dry. Once the exterior of the vehicle is cool and completely dry to the touch, the polishing process may commence. Here, you’ll need multiple grades of polishing compound, in varying levels of coarseness, microfiber applicator pads, an orbital polishing tool, and all of the usual eye, hand, and ventilation safety gear.
Quick Tip: If you have a paint protection film in play underneath all that ceramic protective coating, be forewarned that the removal process will need to be done with great care in order to prevent damaging this underlying layer.
Start with the most aggressive cutting compound, and apply a modest amount to a fresh polishing/buffing pad affixed to the end of the power polishing tool. Test the compound out on one inconspicuous corner of the vehicle (we suggest the lower portion of a rocker panel or bumper), and if all appears fine and dandy, move onward to polishing the rest of the automobile.
After hitting every portion of the vehicle, all while reloading the buffing pad with polishing compound as necessary, move on to a medium grade cutting compound, and repeat the entire process. Be careful not to focus too intently on one particular area or apply too much pressure, as it doesn’t take much to cut into the clear coat, or worse yet, into the car paint.
First two sweeps complete, you will move on to the third, and what will hopefully be the final polishing procedure. Here, the use of the mildest polishing compound should be implemented, as it will help remove any surface scratches caused during the first two passes. Once this final sweep is complete, the vehicle should have a dull, hazy appearance, as loads of superficial swirl marks have formed in the residue left behind from the polishing process. At this point, it’s time for a rinse, followed by an isopropyl alcohol wipe-down with a microfiber towel. After that, it’s on to installing a fresh layer of DIY ceramic coating, for years of unparalleled paint, glass, and plastic protection.


